Microsoft has finally released an ISO file for the Windows 11 Insiders Preview. Previously, your only option for installing Windows 11 was to first install Windows 10 and then upgrade it to version 11 through Microsoft’s Windows Insider program. But now you can save time and effort by installing the new OS directly through the ISO file.
SEE: Windows 11 cheat sheet: Everything you need to know (free PDF) (TechRepublic)
Working with an ISO file gives you the flexibility to install a program such as Windows 11 directly from the file itself or by copying it to a USB drive or burning it onto a DVD. From there, you can install the OS to a dedicated PC, a dual-boot system or a virtual machine. Let’s look at how to grab and install the new Windows 11 ISO file.
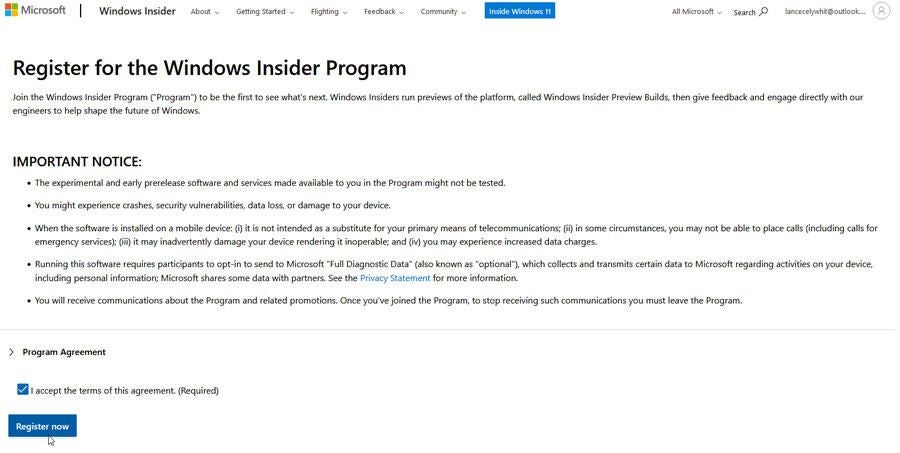
First, you’ll need to join the Windows Insider program if you’re not already registered. Browse to the Windows Insider page and sign in with either your own personal Microsoft account or a business account that you use for your organization. At the registration page, check the box to accept the terms of this agreement and click Register now (Figure A).
Figure A
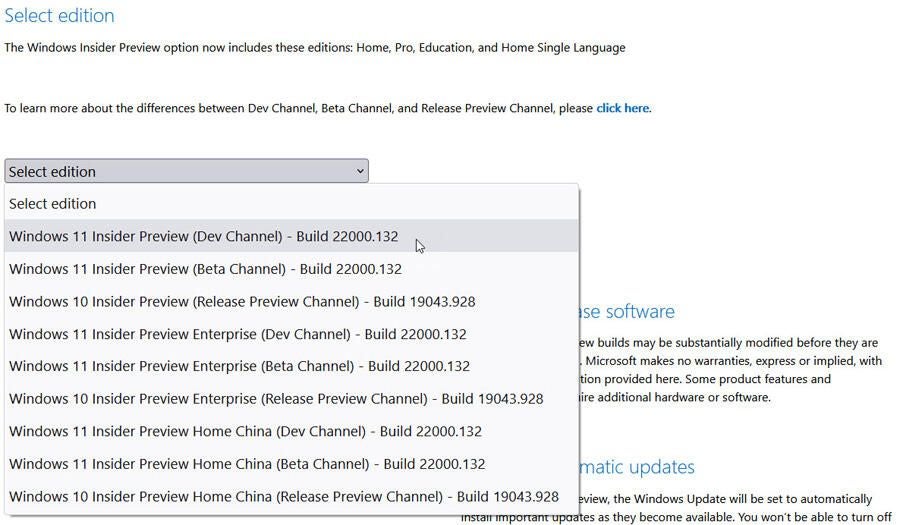
To download the Windows 11 ISO file, head to the Windows Insider Preview Downloads page and sign in with your account. Near the bottom of the page, click the dropdown menu for Select edition. Here, you can choose either the Windows 11 Insider Preview (Dev Channel) or the Windows 11 Insider Preview (Beta Channel).
The Dev channel contains the latest features and updates for Windows 11 but is typically more unstable. The Beta channel contains more polished features and updates and is more stable. Either way, select the channel you want and then click Confirm (Figure B).
Figure B
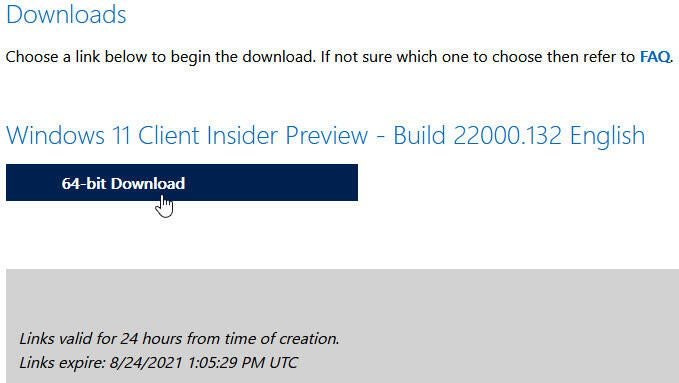
Next, choose your product language and click Confirm. Click the Download button to download the ISO file to your computer (Figure C).
Figure C
Now that you have the Windows 11 ISO file, there are a few ways to work with it depending on how and where you plan to install it. If you want to install Windows 11 in a virtual machine, then you can use the file directly. Whatever virtual machine application you use, it should at some point ask for the source of the software you wish to install. At this step, simply browse to and select the Windows 11 ISO file you downloaded.
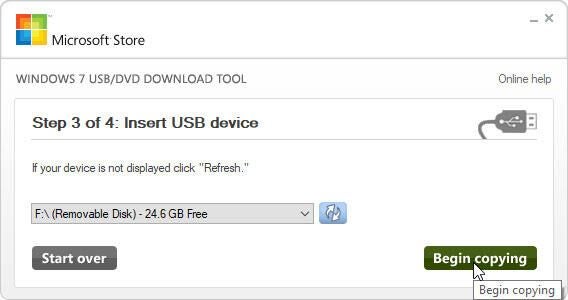
If instead you want to install Windows 11 on a dedicated PC or as part of a dual-boot setup, you’ll want to copy the ISO to a USB drive or burn it to a DVD. To set this up, I recommend a free Microsoft utility called Windows USB/DVD Download Tool, which is an oldie but a goodie. The advantage with this app is that it not only copies or burns the ISO file but makes the USB or DVD bootable. Microsoft no longer offers this tool directly, but you can still snag it at third-party sites such as MajorGeeks and FileHippo.
The current Windows 11 ISO is a bit over 5GB in size, so you’ll need the right media to hold it. A USB drive is the easier option as you can easily find a flash drive with at least that capacity. A standard DVD has only 4.8GB of space, so that won’t work for this ISO file. Instead, you’d have to use a dual-layer or double-layer DVD, which can handle up to 8.5GB of data, or a Blu-ray drive if your PC is equipped with one.
After installing the Windows USB/DVD Download Tool, open the program. At the first screen, browse to and select the Windows 11 ISO file. At the next screen, choose either USB or DVD. If you opt for USB, make sure the correct USB drive is listed and then click the button for Begin copying (Figure D).
Figure D
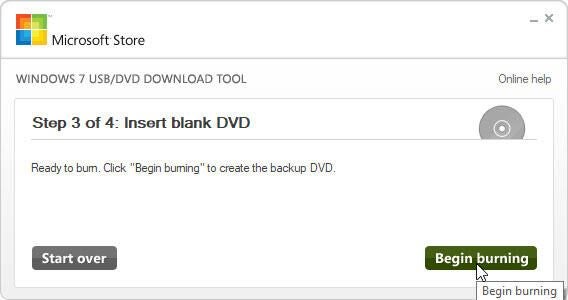
If you opt for DVD, make sure you’ve inserted a dual-layer or double-layer DVD or a Blu-ray disc and click the button for Begin Burning (Figure E).
Figure E
After your USB drive or DVD has been created, you can use it to boot up a dedicated PC on which you can install Windows 11 directly or as part of a dual-boot scenario.

Subscribe to the Microsoft Weekly Newsletter
Be your company's Microsoft insider by reading these Windows and Office tips, tricks, and cheat sheets.
Delivered Mondays and Wednesdays